Uploading new students on Essential Assessment
Essential Assessment allows you to bulk-upload student accounts through our template. You're also able to create classes manually, inputting students one by one.
Creating new student accounts (bulk upload)
Select Upload New Students to create new accounts for students who have not previously used Essential Assessment before.

To upload classes, you must use our class template. When using this template, please do not remove or edit any pre-existing information in the template. Select Download Template to access this.

The following information is mandatory for each student: name, student ID, year level, and class. Non-mandatory fields like usernames and passwords will be automatically generated if not inputted. Once saved, click Choose File to upload then template and then Upload 2025 Students to initiate the student account creation.

The pre-existing template must be utilised - the system is unable to process spreadsheets formatted differently.
⚠️ Important: Reviewing Your Pop-up Notification
If there is an issue with the file you are trying to upload or the data you are entering, this will show via a notification on your screen. This notification alerts you to problems that need to be corrected before your submission can be processed. Common issues include:
- Incorrect file types
- Incomplete mandatory fields
- Duplicate information (like Student IDs)
- Passwords that do not meet the required complexity
- Subscription Limit Exceeded: When attempting to create new student accounts, the system automatically checks the school's remaining subscription count. If the number of new students being added exceeds the available subscriptions, the system will prevent the submission and display a message indicating that the subscription limit has been reached.

Please review the details in the notification carefully to identify and fix the specific error. When selected to proceed, only students without errors will be uploaded.
If all enrollment data has been successfully validated and is free of errors, the system will proceed to process those records. A successful enrollment submission will be confirmed by the view shown below.

Once the upload is successfully completed, you will find the new classes in the class list immediately.

Creating new classes (Manual Creation)
Click Add Class.

Name your class and click Add Class.

Creating new student accounts (Manual Creation)
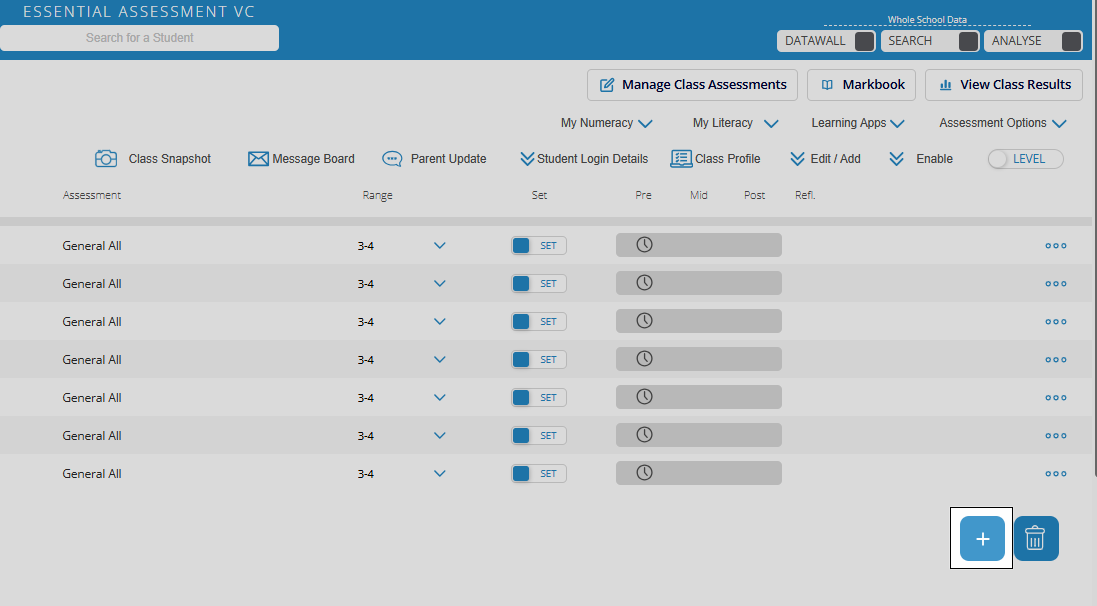
Click into the class you would like to add the student to and click the + icon on the bottom right-hand corner to add students.
Click Create New Student(s).

From here, change the number to the number of students you would like to add and click Next.

Enter the students' details. You can update all fields, including the username and password.

After inputting the student details, select Create Student(s) in the bottom right to instantly create the class.

Please see our guide here on how to edit and remove student accounts: Editing, Removing and Restoring student accounts